
What is a “sprue”, and why should I use them with my lasercutting designs?
Sprues are most commonly seen in injection-moulded plastic toys. For a fuller description check out the Wikipedia definition, but briefly:
In the image below they are the little links that connect the plastic toy components. They are created as part of the moulding process, but the useful secondary function of sprues is that they hold the components securely in position within a plastic frame, until you twist or cut the components out. So in the image below, you can see that the actual toy pieces are held safely in place until the user needs them, rather than the pieces just rattling around in a box or falling on the floor and getting lost.

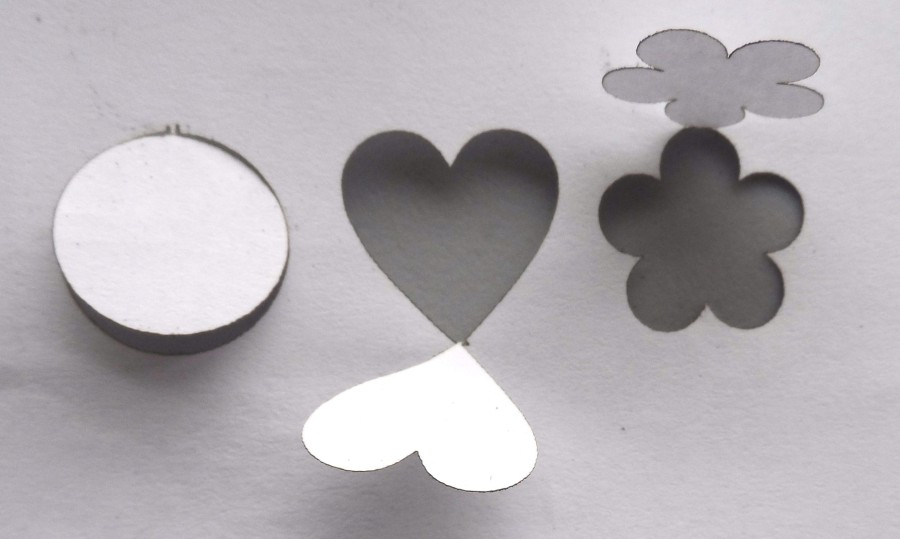
In laser cutting projects, you often need to cut small pieces out of a light material such as paper, card, plastic or wood. But if they are smaller than the holes in the cutting bed of the laser machine, the pieces often fall through the holes and are lost as soon as they have been cut. Similarly if the machine blows or sucks air as part of the cutting process then very small pieces can just fly away.

So we need a way to cut the pieces, but to stop them falling down or blowing away. One solution is to include sprues in the cutting designs. (Generally speaking, they will be useful if the piece to be cut is less than 1cm squared, or if anything is being cut from a piece of paper.)
Sprues can be created very quickly and easily in most vector-based drawing software (e.g. Photoshop or CorelDraw). I happen to use CorelDraw, but the principles are the same for most other apps/programs:
Step 1: Make sure that you can edit curves and manipulate/add nodes on the cutting path of the design. (In CorelDraw it is the “Shape Tool” that allows you to do this.)
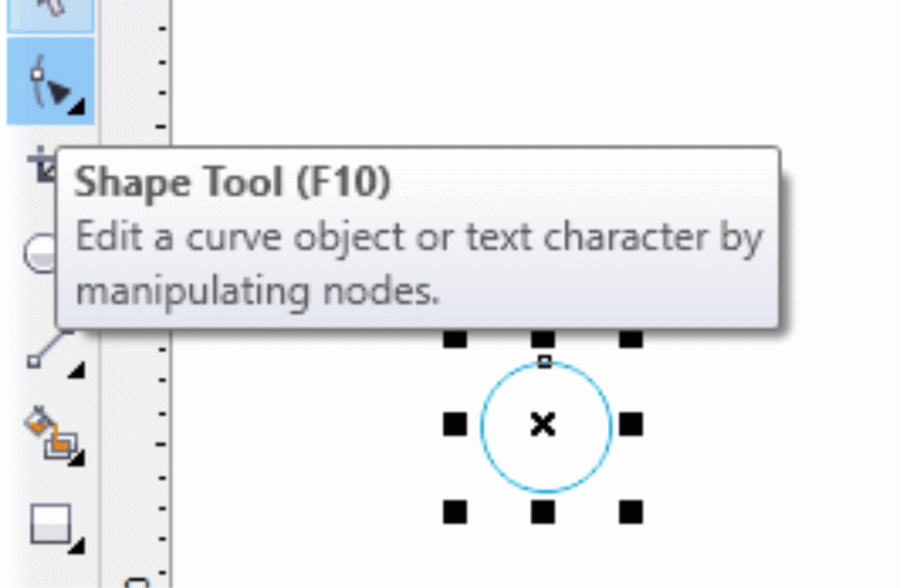
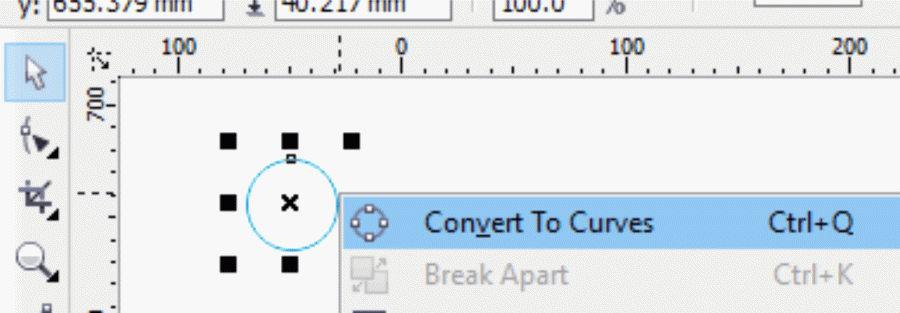
Note: If you can’t see any nodes to edit, you may need to convert the shape to curves first (e.g. by right-clicking the mouse and selecting “Convert to Curves”):
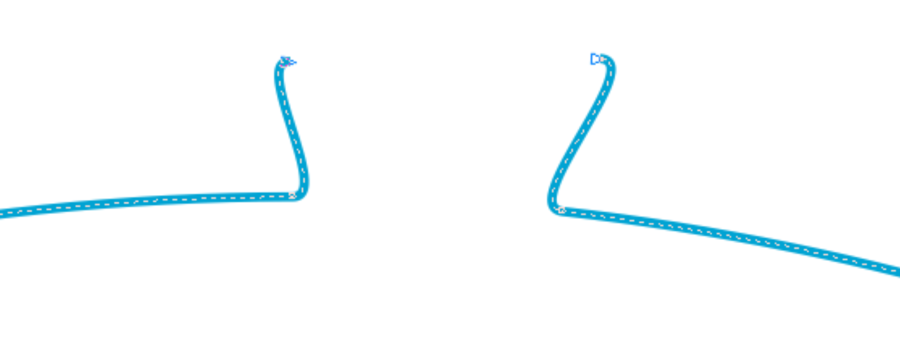
Step 2: Zoom in really close to the object (e.g. so that a 3mm line fills the whole screen), then add two new nodes as close to an existing node as you can manage:

Step 3: Select the middle node of the three nodes that are very close together, and then break the path of the curve. (e.g. by right-clicking and choosing “Break Apart”):

Step 4: That middle node should have broken in two, so take one of the two resulting nodes and drag it about half a millimetre outside the curve. Then do the same for the other new node. This creates a small break in the cutting line, so that when you the cut piece it should now remain fixed in place until you are ready to push or tear it from the material you were cutting.

Step 5: Push or pull the object out of the sheet of material that it is fixed in.
(You may need a knife or scissors to help cut it free, and then a file or a knife to cut away any extra material that is not required.)

That’s it! I hope you liked this article. If you have any comments or questions, please feel free to share them in the comments section, or via the contact form.