

(This post was originally on my KayVincent.com website, but now that I’ve got the LaserSister.com site I am moving or copying a lot of the laser-related articles over here. That way I should end up with a website full of posts relevant to laser-cutting, and can leave the other website/blog as a more general source of info.)
How to Make Quick and Easy Personalised Christmas Tree Ornaments Using a Laser Cutter
Here is a step-by-step tutorial on how to make quick and easy personalised Christmas tree ornaments with a laser cutter. It shows how to create a really simple round bauble shape that you can then etch with a message or image. Alternatively, you could decorate it by hand (or give/sell it to someone else so that they can decorate it by hand). If you’ve got access to a laser cutter then this could be a great (fast!) boost to your Christmas income.
If you don’t have time (or can’t be bothered) to go through the steps learning how to create the shape yourself, just click on the button below and it will take you to a (free) pre-made version of the design so that you can immediately start using it and cutting your own personalised Christmas baubles with your laser cutter. The vector design is done for you, so all you have to do is put your own text on there and it should be ready to cut.
The reason I’m using CorelDraw is because that is the recommended software for my particular laser machine, but most other vector-drawing software has similar commands and effects (although the tools and menus might be called something slightly different).
Step-by-Step: How to Make a Simple Christmas Bauble Shape With a Laser Cutter
1) Start a new blank document in CorelDraw.
Mine uses millimetres as the measuring unit. If you want to change that, just click anywhere in the blank document and the “Units” dropdown should appear along the top somewhere:

2) Use the Ellipse Tool to create a circle 80mm wide
(Tip: Hold down the Ctrl key at the same time as you are drawing, to make sure you end up with a circle instead of an oval)

If the circle didn’t come out at exactly 80mm, you can change it. Make sure that the ‘Lock Ratio’ button is selected, then type “80″ into the width for “x:”

3) Use the Rectangle tool to create a rectangle 15mm wide by 9mm tall

If you don’t get exactly that size it doesn’t matter, but if you want to use precisely those dimenstions then:
- Use the Pick Tool to select the rectangle
- Un-select the ‘Lock ratio’ button so that the x and y measurements can be changed separately to each other
- Type in “15″ for the x measurement, and “9″ for the y measurement
- (then it’s usually best to go back and re-select the ‘Lock ratio’ button)

4) Align the two objects on the same central line
Use the Pick tool to select the circle and rectangle. Then press “C” on the keyboard. This will make sure both objects are lined up vertically with each other.
(You can also go via the menu: Arrange> Align and Distribute> Align centers vertically)

5) Position the rectangle on the top of the circle
Use the Pick Tool to select just the rectangle.
Then either use the ‘down’ key on the keyboard to move the rectangle, or hold down the ‘Ctrl’ key and drag the rectangle downwards.
Aim to get the bottom corners of the rectangle just inside the circle:

6) Create a 5mm circle for the ‘hanging loop’
Use the Ellipse tool to create a circle with a 5mm diameter. (Remember to hold down Ctrl + C to make it a perfect circle instead of an oval.)

7) Create a 12.5mm circle as the outside part of the ‘hanging loop’
Use the Pick Tool to select the 5mm circle, then duplicate or copy it*.
Then change the second circle so that it is 12.5mm across:

*To make a copy of any shape, you can do this by selecting the shape then:
- using the shortcut of Ctrl + D
- … or by copying and pasting (Ctrl + C then Ctrl + V)
- …or by using the Step and Repeat menu and clicking ‘Apply’. (If you can’t see the Step and Repeat menu go to Edit > Step and Repeat)
8) Link the two circles to convert them into just one object
Use the Pick Tool to select both circles. Then press Ctrl + L to link the two objects together to make them into one doughnut-shaped hanging loop (this is important for a Step 12 later, when the ring is ‘welded’ to the rectangle shape).

9) Align the hanging loop and rectangle
Use the Pick Tool and highlight the bauble and the rectangle at the same time (e.g. either draw a box around them both, or select one shape then hold down the Shift key while selecting the other shape.) Then press “C” on the keyboard to align them both on the same central line.

10) Reposition the hanging loop
Use the Pick Tool to select the hanging loop, then move it down (using the cursor key, or hold down “Ctrl” button at the same time as dragging the object down) until the bottom of the loop overlaps the top of the rectangle:

11) Use the Boundary tool to combine the rectangle and large circle
Use the Pick Tool (and hold down the “Shift” key) to select the rectangle and large circle at the same time.
…then use the Shaping Tool to create a boundary. This will now be the main bauble shape.
You can find this tool via Arrange > Shaping > Boundary (make sure that you un-select “Place Behind selected” and “Leave Original Object(s)”):
12) Weld the hanging loop and main bauble shape together
Use the Pick Tool to select the hanging loop, then click the “Weld to” button
(If you can’t see the Weld To button, you can find it in Arrange > Shaping > Weld.)
Then click on the outline of the main bauble shape, and the two shapes should then weld together.
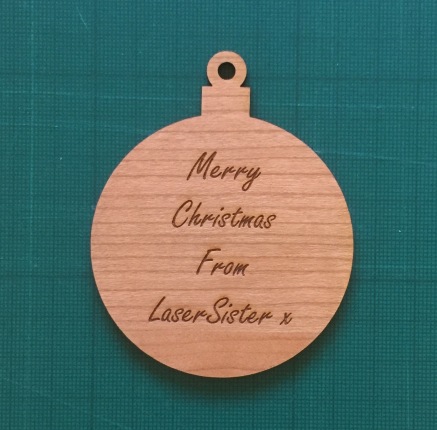
You should now have a simple bauble shape, ready for cutting!

Now you can use the Text Tool to add a personal message for etching onto the ornament, which will make a really quick and easy gift for someone.
Speaking of Christmas – here is a gift for you! I’ve created a free downloadable file for you to use with your own laser cutter, if you like. Just click the button below and it will take you to the downloadable resource.
I hope you found the above tutorial useful. Let me know if you’d like any more!